As we've been saying all along, one of the nicest things about container gardening in Puerto Rico is being able to garden all year long. Even as the temperatures dip into the 70s (yes, that's a dip for Puerto Rico) we're still able to grow tomatoes, cucumbers, peppers and other warm weather crops. This has inspired me to create a new motto for this little blog, #gardeningallyearlong. So follow us on Twitter @ContnrgardenPR where we'll be using this tag when we tweet about gardening activities over the winter.
Tuesday, December 20, 2011
Monday, December 19, 2011
It's the Season... for Herbal Vinegars
The Holidays are here and we already feel the spirit. We just want to party, have some days off, eat the season's treats... but we also want to share with family and friends and give away nice reminders of love and care. (Editor's note: #spreadthelove) As a gardener you have lots to share. Today we'll talk about one of the many great gift ideas for the season: herbal vinegars.
We previously talked about basil vinegar in our Yucky-Yummy post. The process to prepare any herbal vinegar is basically the same. Take snippings or leaves of your favorite herb, stuff them loosely into a glass jar with a fitting lid, and pour enough vinegar to cover all foliage. White wine and red wine vinegar are the best kind to combined with herbs. Wait about a week, strain off and discard the leaves (This is an important part since the leaves will rot in your vinegar. Yuck). There are numerous recipes that use herbal vinegar. Remember they make excellent salad dressings but can also be added to pot roasts, stews, sauces for chicken and fish or steamed vegetables.
We previously talked about basil vinegar in our Yucky-Yummy post. The process to prepare any herbal vinegar is basically the same. Take snippings or leaves of your favorite herb, stuff them loosely into a glass jar with a fitting lid, and pour enough vinegar to cover all foliage. White wine and red wine vinegar are the best kind to combined with herbs. Wait about a week, strain off and discard the leaves (This is an important part since the leaves will rot in your vinegar. Yuck). There are numerous recipes that use herbal vinegar. Remember they make excellent salad dressings but can also be added to pot roasts, stews, sauces for chicken and fish or steamed vegetables.
If you enjoy herbal fragrances, another delightful use for these vinegars is hydrotherapy. The process is simple: add about a cup of herbal vinegar to the bathwater, slip in and enjoy. Alternatively you can just add half a cup to use it as a hair rinse. Don't worry, the vinegary smell dissipates quickly and you’re left with a gentle herbal fragrance on your hair. Many herbs are good for your skin and so is the vinegar itself. Vinegar cleanses the pore, restores skin and hair pH to the proper level, it's also good for your scalp, and helps reduce dandruff.
Each herb provides different benefits to your body or hair:
- Chamomile is considered soothing and relaxing and it is excellent for dry skin.
- Bay, oregano and sage are good for sore muscles.
- Basil, bay, fennel, lavender, mint, rosemary, sage and thyme stimulate blood circulation, so they are both invigorating and relaxing.
- Calendula and spearmint are also soothing to tough or damaged skin.
- The foliage and flowers of bay, nasturtiums, rosemary, and sage have astringent properties which will tighten the pores of the skin.
- Calendula and chamomile lighten hair color, blonds get blonder and auburn and redheads get brighter.
- Sage darkens hair color.
- Calendula, parsley, rosemary and sage add shine and body to the hair, and help control dandruff.
- Chamomile makes hair softer.
- Calendula, lavender, mint and rosemary are good conditioners for oily hair.
- Parsley and sage are good for dry hair.
Safety precautions: Not everyone reacts favorably to herbs, beware of allergies. Test vinegars on your skin before using any new herb. Dab some on with a cotton ball and wait and hour or so for any reaction. Discontinue use if redness or itchiness appear.
 |
| Nice bottles with a few touches will make your gift extra-special |
- Use pretty bottles, the kind with removable stoppers are the best.
- Strain the finished vinegar to remove all particles. Although a spring in the bottle does look nice, the fact is that it degrades too fast, creating unpleasant layers of sludge. If you really want to include a spring or some leaves attach them to the outside of the bottle.
- Create a gift tag describing ways to use the vinegar, both in cooking and cosmetically or add a recipe card.
- Add crafts or labels with floral or herbal designs, either to the bottles or the tags.
Send us your comments about your herbal vinegars or other gardening gifts this season. We bet everyone will be delighted. Happy Holidays!
Monday, December 12, 2011
Getting back on the horse
After two weeks sightseeing in India we're back (and better than ever?)! Time to get back on the horse and do some gardening.
Even with a garden-sitter some of our plants suffered while we were on vacation since our friends went away for Thanksgiving. This left our plants without water for 3-4 days. As a result we lost our cucumbers (which were already struggling), a cherry tomato (which was already struggling), our bell peppers (which were already struggling due to an aphid infestation) and a few seedlings. I hope you saw a pattern there. Basically, all plants which were already weak or young were lost. Every other healthy plant was spared although some (such as our miniature and our new cubanelle pepper) were weakened and attacked by aphids (Damn you aphids. Why won't you go away! Mental note: Write a post about aphids). But alas not all is bad news. Our arugula looks gorgeous and the small leaf oregano has spread considerably. Also, some basil seedlings have matured and the payasitos are starting to bloom and multiply.
With all that being said we're ready to get back on the horse (Didn't we say that already?). Yesterday we planted some cucumber and bell pepper seeds to replace the ones lost. We previously had 3 cherry tomato plants which produced more tomatoes than we can consume (and gift to friends). Therefore, we're looking into what we can plant to substitute the cherry tomato plant. Maybe a plum tomato, some heirlooms tomatoes, a few lettuces, some flowering plants, who knows. That's one of the great things about container gardening. There are hundreds of possibilities to choose from; a little something for everyone. Keep tuned for more information and for updates on our little container garden.
Sunday, November 20, 2011
Going away? Plan ahead
We're going to take a little vacation soon which means we need to prepare. The last time we left for a few days our cucumbers suffered (see A Death in the family). It also means no posts for at least two weeks! (It also explains why we haven't posted anything in a while. Planning a vacation is time-consuming) So what things you need to take into account when you're going on vacation?
- Watering - Your first (and probably only concern but we threw a few additional ones just for the fun of it) concern should be watering. Your plants might survive a day or two without water outside and maybe 3 or 4 days if you move them inside. For short trips you can get some water bottles or 2 liter soda bottles and fill them with water. Make a small hole in the cap and insert the bottle upside down in the soil. Water will slowly trickle out as the soil dries out. If your time away will be longer than a few days then we suggest a garden-sitter. We recommend that you take this person to your garden and instruct them on how to water your plants. Also, you can mix water retaining hydrogels into your soil. This will increase the availability of moisture in your pots. There are also automatic watering solutions but we cannot comment on them since we haven't tried them (Crystal ball: I see a future post about this topic).
- Pruning - Take this opportunity to do a little pruning (Editor's note: Joel hates pruning but he knows it's necessary). This will help reduce the water requirements of your plants.
- Harvesting - Harvest as many fruits and vegetables as possible. Also teach your garden-sitter how and which plants to harvest while you are away. They won't mind eating some fresh vegetables while you're out.
- Location - Since you have a container garden you also have the opportunity to move your plants to a shaded location. This will obviously reduce the water requirements for your plants.
Saturday, November 12, 2011
The Holy Grail
 |
| Strawberry plant. Easily recognized by its 3-parted leaves. |
Growing strawberries in Puerto Rico is not an easy task. Some say it is impossible unless you live in the mountains. Due to the high temperatures and humidity extra care must be taken to avoid fungus, root rot and burnt plants. In temperate, and even sub-tropical, climates strawberries should be grown in full sun. In the tropics full sun will most likely kill your plants so it is recommended to grow strawberries is semi-shade or 3-4 hours of early morning or late afternoon sunlight. Another precaution to take is not to get the leaves wet which will likely cause fungus (usually, powdery mildew) to develop.
Strawberry plants are technically perennials but are usually grown as annuals. The plants you find at the nursery are called mother plants. These plants produce a significant amount of berries and also produce runners called daughter plants. These daughter plants can be allowed to root or cut from the mother plant since they drain energy that could be directed towards fruit production. If allowed to root they will become a mother plant next season. A good trick is to put a rock over the stem of the runner to pin it to the ground to encourage root growth.
Strawberries are classified into three classes: June-bearing, ever-bearing and day neutral. June bearings bear fruit in June (no surprise there), ever-bearing produces two batches of fruit (one in early summer and one in late summer) while day neutral are not affected by the length of a day and produce small batches of fruit from June until frost stops them. We have no idea which plant we actually got but I will assume it's a June bearer since it's the most common. (Editor's note: Always research your plants before buying.) It would be interesting to see how day neutral plants would behave in Puerto Rico since there is no frost.
Will we succeed in growing strawberries in the tropics? Keep tuned to find out and for more information on growing strawberries.
Wednesday, October 26, 2011
Did someone say party?
 |
| Pink and red flowers on our verbena. |
In prehistoric times when the world was in darkness (before the blog was started) we went crazy and bought (almost) every seed pack we could find. (Editors note: If it wasn't for Jessica Joel would have bough every seed pack including watermelons and pumpkins. Good thing Jessica can keep him straight.) One of these seed packs was for verbena, a truly beautiful flowering plant. We placed a few seeds in peat soil pellets and two plants emerged. Verbena germinates quickly in Puerto Rico's hot weather although I cannot recall exactly how long it took. After a few weeks we moved one plant to a mixed pot with tomato, chives and oregano while the other was placed by itself on a pot. The plant in the mixed pot received full sunlight (6+ hours a day) while the other received only 3-4 hours of sunlight in the early morning.
 |
| The verbena which we grew by itself before the whiteflies. |
Have you grown verbena in your garden? Let us know.
Thursday, October 20, 2011
Arugula Follow Up
 |
| Our lonely arugula. Soon to be joined by four more friends |
Arugula is a green leaf with a growth pattern similar to open-leaf lettuce. It has a peppery flavor which contrasts with other mild-flavored green leafs such as spinach or lettuce. Young leaves develop at the center of the plant and expand outward as they grow. Once the leaves reach full size they may harvested one leaf at a time. Remember not to take too many leaves or they plant may die. Since arugula is considered a cool season vegetable it is recommended that it be planted during the "cooler" months (September - March) to avoid bolting. Also, provide some shade during the hotter hours of the day. That being said bolting is inevitable. Once it happens you can remove the plant or allow it to go to seed. The flowers are also edible and can be added to salads to give it a spicy punch.
We definitely recommend having this plant in your container garden. Arugula is uncommon or non-existent in Puerto Rico supermarkets so your best bet is to raise it from seed which is fairly simple. Just plant, water and harvest. Have you raised arugula in Puerto Rico? Share your experiences with us in the comments section.
Thursday, October 13, 2011
Tastes like onion but won't make you cry
 |
| The beginnings of our scallion forest |
Scallions are a perennial plant that's commonly used in Asian (and Jessica's yummy) cuisine. It's usually served raw in salads or as a garnish but can be cooked to provide a mild onion flavor to soups, seafood, and even scrambled eggs. Scallions can be raised from seed or young plants can be bought from nurseries. But by far our favorite method is to plant supermarket bought scallions. We save the white stalk that contains the roots and we plant it in a sunny location (6+ hours of sunlight). Care must be taken since the roots are very shallow. Plant the scallion deep enough for the roots to be covered by the soil but not the white stalk. Water thoroughly to establish the plant. Usually the next day you can spot green shoots coming out of the white stalk. Congratulations, you are now the proud owner of a scallion plant.
 |
| A few days after planting you should see green shoots |
Have you grown scallions in your garden? Share your experiences in the comments section and stay tuned to watch the progress of our scallion "forest". (Scallion forest is a trademark of Container Garden PR. All rights reserved.)
Sunday, October 9, 2011
Scarecrow is the new Metal Chicken
As you should know, because you
always follow our blog, we had a problem with a crazy bird the other day;
the bird was unmercifully taking our tomatoes. Well, the problem is still present;
we have lost several additional tomatoes, snif, snif. So we have been thinking of
ways to control our foes and we actually found an elegant way of solving the
problem.
Joel and I were at Home Depot
picking some things for the apartment and of course, for our garden, and I was joking
with Joel that we should get a scarecrow to get rid of all the birds. And awesomely,
there it was: a 9 foot scarecrow! “We should totally get it!”
There are available wire nets that
you can place surrounding your plants. You can also use a fabric mesh that
protects your fruits and vegetables. They are not very expensive, and less of an
eye sore than the wire nets. You can wrap your fruits or vegetables with these
and they’ll ripe as usual. And remember you could also take advantage of your trellis. But why go elegant when you can go fun, right?
 |
| Enrique Iglesias |
Inspecting it closely we noticed
it has glowing eyes. Glowing eyes! This is a once in a lifetime opportunity. We
then remembered our fellow blogger and personal heroine: The Bloggess. (Editor's note: Jessica meant her personal heroine. That crazy woman shouldn't be any man's heroine. Although I must admin she's very funny.) We
remember all the joy Beyonce has brought to so many lives (if you are
unfamiliar with this you should really start weighting your priorities in life,
go here and read it, you’ll understand).
So we embarked in the task of
taking a giant scarecrow home. Luckily, giant scarecrow makers know most of us
have tiny cars and they manufactured it in two detachable parts. So Enrique
Iglesias, that is the name of our giant scarecrow, went home comfortably laying
down in the back seat of the car.
Now Enrique Iglesias is guarding
our tomatoes with his life. I don’t think any bird will dare eat anything else
from our garden but they might well as try it and behold the power of the glowing
eyes… or the awful singing, we really don’t know if our Enrique sings as bad as
the original. Did I said bad, I meant... special.
Joel said it all when he declared:
“If laughing could always be so cheap, I’d buy a scarecrow every day.”
Thursday, October 6, 2011
Ring My Bell
 |
| One of our two bell pepper plants |
Capsicum annuum is a perennial plant belonging to the Nightshade family. This family of flowering plants includes commonly known crops such as tomatoes, peppers, tobacco, eggplant and potatoes. The pepper plant requires high temperatures and grows to around 1.5 feet which makes it ideal for container gardening in Puerto Rico. Peppers do not tolerate frost which is why most US and British literature list them as an annual. The plants are able to adapt to a wide array of soil conditions with the requirement that the soil must drain well. Provide full sun (6+ hours) and keep the soil moist to keep the plants happy. Too little sunlight will cause stunted growth and little flower production while dry soil will cause the leaves to wither and the fruit to get bitter. According to the bible (The Bountiful Container by McGee & Stuckeys) peppers need a few microelements, calcium, magnesium and sulfur, which can be found in common household items. Calcium can be found in eggshells, magnesium in Epsom salt, and sulfur in matches. It is recommended that when transplanting peppers you put a few matches and dried eggshells at the bottom of the planting hole. Epsom salt can be mixed with water and applied when blossoms develop.
Growing from seed is fairly easy in the tropics since the seeds require high temperatures to germinate. At typical tropical soil temperatures (75-85 degrees) the seeds will sprout with a very high yield in 3-4 days. We've planted 3 pepper seeds, 2 bells and 1 Cubanelle or "Pimiento de Cocinar" (which is also the same plant C. annuum), and we got 3 plants. Flowers are small, white, and self pollinating and usually emerge about 2 months after germination. Fruits follow after a few days although not all flowers set fruit. Between 4 and 5 full bell peppers is the most we've been able to have at a time per plant. However, other pepper varieties are able to produce more peppers per plant.
Peppers, as most flowering plants, require a higher percentage of phosphorus than nitrogen for optimum fruit production. Using a fertilizer with a high nitrogen ratio will produce lots of beautiful leaves but few flowers. Our recommendation is to use a fertilizer with a 1:2:1 ratio (Editor's note: If you need a refresher on what the fertilizer numbers mean see our fertilizer post: The F Word). Leaves are usually a deep green but if they start yellowing switch to a balanced fertilizer or supplement your soil with nitrogen. Most bell peppers start green and, as they ripen, they turn red, yellow or orange depending on the variety cultivated. When harvesting peppers it is best to cut rather than pull the fruit since you may damage the plant. Also, we recommend securing the plant with a stake since they can get top heavy when bearing fruit which may cause them to tilt, fall over or get uprooted during strong winds (Editor's note: Obviously we recommend this because our plants already got uprooted during strong winds. Again, please learn from our mistakes.).
Bell peppers are susceptible to pests and diseases such as aphids, whiteflies, powdery mildew, tobacco hornworms, flea beetles, blossom-end rot, TMV, and others. Ours have suffered from whiteflies and powdery mildew. As always take the proper precautions and actions to control or eliminate each problem.
Have you grown bell peppers in your garden? If so, please share your experiences with us in the comments section.
Sunday, October 2, 2011
Hold Me Tight
 |
| We used a net to support our cucumbers |
When planning your garden take into consideration the growing habits and final size of your plants. Common plants such as tomatoes, cucumbers, grapes, beans, climbing roses, and peas require a trellis for proper growth. Vines require a trellis for growth but also to support its fruits. How a vine climbs will determine the type of trellis you use. Some vines, such as cucumber, use tendrils to secure itself to any structure. Other vines use its leaves or stems to wrap around structures. As a general rule of thumb thicker structures are needed for "wrapping" vines while thinner materials may be used for "twiners". For our cucumbers (a "twiner") we used a net tied to our balcony posts for support (see picture above). We helped the plant by loosely wrapping the tendrils around the net. After a few hours the tendrils will coil and wrap themselves tighter thus securing itself.
 |
| Bamboo fence used as a tomato trellis |
It is always recommended that you secure your trellis to your pot or to a strong structure. Otherwise it may shift during strong winds, heavy rain, or under heavy weight. Also, metal trellises are not ideal to use in Puerto Rico because they tend to get hot and burn your plants.
Almost any material can be modified into a trellis. This post barely scratches the surface on trellises. The only limit is your imagination. So share with us what you've used to provide support for your plants and join us next time for more on container gardening in Puerto Rico.
Thursday, September 29, 2011
Pests: Whiteflies
 |
| Adult whiteflies (photo from Wikipedia) |
We have two verbena plants. One is in a pot with a tomato and oregano while the other is in a pot by itself. We noticed something was amiss when the plant in the mixed pot was flowering while the one by itself started to languish. We also noticed that the bottom of some leaves were covered in black spots. Curiosity turned into dread. These little flies were no good.
These flies, called whiteflies, are a common pest in most types of gardens. Sadly for container gardeners in Puerto Rico these flies thrive in hot weather. There are two common types of whiteflies: the greenhouse whitefly (Trialeurodes vaporariorum) and the silverleaf whitefly (Bernisia sp.). Whiteflies lay small, oblong eggs on the underside of leaves. They go through four nymphal stages with the final stage being the flying adult. Through all stages they feed on plant juices which weakens the plant. They excrete a substance called honeydew which as its name suggests is sweet and sticky. Ants love this stuff. If you see many ants in your plant you may have an infestation of whiteflies or aphids (Editors note:Always follow the ants. They'll lead you straight to the problem.). Besides weakening your plants whiteflies are capable of transmitting viruses such as tomato yellow leaf curl. They also cause leaves to develop a black sooty fungus.
Controlling whitefly populations is difficult. They are usually resistant to most insecticides. The best approach is prevention. Carefully observe your plants every day for signs of weakness, yellowing or emergence of eggs. Removing affected leaves or plants will ensure control of whitefly populations. If you are past prevention (as we are) there are several things you may try.
- Vacuuming adults early in the morning when it is still cold. Use a small hand vacuum to avoid damaging your plants. Place vacuumed flies in the freezer to kill them off.
- Application of an organic insecticide soap will kill some flies.
- Yellow sticky traps will attract flies. These traps can be used to monitor and control populations.
- Natural predators. Ladybug larvae, Green Lacewing, predatory mites and some birds are known to kill whiteflies.
Monday, September 26, 2011
Retaining water isn't always a bad thing
 |
| Micropuntia - top, Gymnocalycium - bottom left, ?? - bottom right |
I find cacti fascinating. They come in many shapes and sizes but what amazes me most is the flowers. They are bright, large, and complex. Seeing a cactus in full bloom is a spectacular sight.
In order to provide the proper care to our cacti I started to do some research (Editor's note: Be a conscientious gardener and always research your plants). Cacti are succulent plants native to the Americas. Succulents have adapted to dry, arid conditions by storing water in their leaves, stems or roots which gives them a "bloated" or succulent look. Cacti usually have spines while other succulents don't. Identifying cacti is hard (at least for me). Flowers make identification easier but ours aren't blooming. An excellent resource for identification and all things cacti is the highly recommended CactiGuide.com. Based on the information available in this webpage I believe that we have a Micropuntia, a Gymnocalycium, and an unknown succulent (not a cactus). You may ask yourself why is this important. Why do you need to identify your cacti? Aren't all cacti the same? That would be no.
Each cactus has different soil, light, and water requirements. Knowing these requirements will allow you grow each cactus under its ideal conditions. As a good rule of thumb most cacti require 6+ hours of daylight, a fast draining soil and little watering. It is recommended that you water your cacti only when the soil feels dry. Overwatering leads to root rot so it's advised that you err on the side of underwatering. The proper soil is also important to avoid root rot. Soil recipes can be found all over the internet. Most recommend using a combination of potting mix, gravel or sand, and peat. We haven't made any soil for our cactus yet but we'll let you know what combination we use when we do. Placing your cactus on a south facing area (in the northern hemisphere) will maximize the sunlight it receives each day (Editors note: Unnecessarily geeky explanation will follow. You have been warned). This is because the sun doesn't move exactly from east to west in the sky. It actually "tilts" towards the south when it makes its travel across the sky. Only during the equinoxes does the sun move exactly from east to west. (End of geeky explanation)
That's all for the basics. Stay tuned for more info on cacti and all other plants in our garden.
Tuesday, September 20, 2011
Lightning Round 1
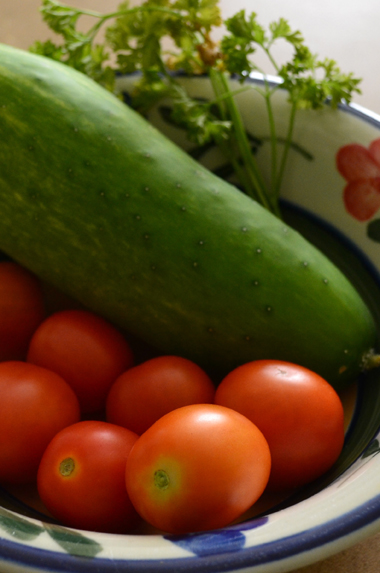 |
| Harvest Time:Tomatoes, Cucumbers, Parsley |
- We've been harvesting fruits and herbs for quite some time but we haven't shared any pictures yet. Here's one for your viewing pleasure.
- A few days ago we went to our favorite nursery and learned a few things about the Payasito. The plant is indeed an annual so it wasn't our fault that it died. We also learned that inside the flower pods there are small seeds that mature when the pod dries out. Usually the seeds fall to the ground and new plants emerge without doing anything. Funny (or maybe sad) thing is I've been pulling little plants where the Payasito died thinking it was just weed (no, not that kind of weed, the bad kind). I've probably been killing little Payasito seedlings! But I've learned my lesson. There are 3 little plants emerging in the area which I'll let them be. Hopefully one of them is a Payasito.
- We have a few additions to our garden. Two flowering plants and three cacti. Pictures coming soon.
- Miniature roses have been blooming for quite some time. We currently have two in full bloom with more on the way.
- We had to transplant our mint because it was drying and re-blooming every few weeks because its pot was too shallow (about 2 inches in depth). We recommend between 4-6 inches of soil depth for good growth.
- Our lettuce is beginning to bloom. Hopefully we'll have some seeds in a few days.
- Last bullet. Redemption. We have a new seedling of lupine, the only plant we've managed to kill. Hopefully, second time is the charm.
Sunday, September 18, 2011
Does it come in purple?
 |
| Purple Ruffles Basil |
A few days ago we were at Home Depot's when I stumbled upon an odd looking plant that I had never seen before. It was about six inches tall with ruffled purple leaves. Imagine my surprise when I read the tag: "Albahaca Mora" ("Purple Basil"). WTF! Purple Basil! It couldn't be. Its leaves didn't have the shape of basil, it was purple, and it didn't smell quite like basil. So what this plant incorrectly labeled? Was I being duped? I didn't care. I had to buy it. (Editor's note: Impulse buys are not recommended or endorsed by Container Garden PR, Inc or its affiliates. Always research plants before you buy. Now back to our regular programming.)
When we got home I noticed that its leaves weren't solid purple instead it had green edges. Now I was sure I was duped. So we got on the internet to see if purple basil existed. Thankfully it did. What we had bought was a sweet basil variant called "Purple Ruffles". It's commonly used to create purple pesto and basil vinegar (which Jessica plans on doing and documenting). Supposedly it also has a slightly different flavor than common sweet basil. We still haven't tasted it yet so we can't comment on its flavor yet. We also read that the leaves can lose their purple color for various reasons including too much sun or too much humidity so we'll have to experiment with various locations to maintain the striking purple color. Keep tuned for updates on how this purple basil and all our other plants are doing.
Thursday, September 15, 2011
Lettuce, why are you bolting away?
 |
| Our lettuce bolting |
Being a cool season plant lettuce presents challenges in Puerto Rico since it's always hot (except in winter in the central mountain region). The main challenge is delaying or preventing a process which occurs in hot weather called bolting. When lettuce (and other greens such as spinach, arugula, etc) receives more sunlight than darkness the plant goes through a rapid vertical growth which results in the production of flowers, and ultimately seeds, at the end of a long stem. In other words, the plant, being under stress (read:hot temperatures), determines that it will not survive and moves rapidly to achieve every plant's ultimate goal: providing seeds for the next generation.
Bolting is inevitable in hot weather which is why it's recommended to plant lettuce in Puerto Rico between September and March. Also, you should consider buying seeds or plants that are "slow to bolt" or "heat tolerant". This information is usually prominently displayed in the seed packs. If/when your plant bolts you have two choices: pull the plant immediately and harvest since the leaves will turn bitter or let the plant produce seeds which you can use for the next crop. We took the latter route and we're letting our lettuce go to seed. Have you had a lettuce bolt? What have you done with it?
Sunday, September 11, 2011
A death in the family
Today's title is a little homage to one of the most iconic moment in a famous superhero's history. One of the first stories in which readers could influence the outcome. If you know what this story is, consider yourself a geek. Now back to our regular programming.
Even though most things are going great in our little container garden there are always setbacks. These setbacks happen to everyone and I wanted to share ours with you, our faithful reader, so you don't feel alone when things go wrong. Last week we went for a long weekend to Punta Guilarte (not recommended btw) to spend some quality time with Jessica's family. We decided to move our plants inside (except for the cucumbers) since we wouldn't be able to water them. In retrospect this was the correct move since the plants would've dried out if left outside. However, there were consequences. Our lupin(e) seedling (which we first mentioned in our After the storm post) did not survive the lack of sunlight and water. Also, our cucumbers suffered a bit from the lack of water and about half of the leaves died. The plants did survive though and produced two beautiful cucumbers during this time. Also, our payasito died during this time. Although to be quite honest it may be pure coincidence since the plant had been in decline for the past few weeks. Lesson: Always research plants before you buy them. For all we know the payasito could be an annual that dies right after flowering, who knows?
Not all is bad news though. We continue harvesting cherry tomatoes on an almost daily basis and we're getting cucumbers every week. We also planted some lupine seeds to replace our lost seedling. So have you had any setbacks which frustrated you? Please share them with us in the comments section.
 |
| Payasito, you'll be remembered |
Not all is bad news though. We continue harvesting cherry tomatoes on an almost daily basis and we're getting cucumbers every week. We also planted some lupine seeds to replace our lost seedling. So have you had any setbacks which frustrated you? Please share them with us in the comments section.
Wednesday, September 7, 2011
Pests: Leaf Miners
 |
| Leaf miner damage on our tomato |
Yesterday, I went to one of my favorite garden blogs (and quite possibly the inspiration for this blog), Life on the Balcony, and right there on the main page was the answer to our question: Leaf Miners. The larvae of some insects burrow themselves in leaves and eat the soft layers inside. The white or silvery trail left is the mine or path being made by the growing larvae. Be warned that the mine is filled with frass (insect poop). So eat greens, such as lettuce or spinach, that show any signs of leaf miners at your own risk.
Killing leaf miners is not easy since they are protected by the leaf itself. Therefore, any spray pesticide (which I don't recommend anyways) will be ineffective. In this case control through other means is necessary. Removing affected leaves is recommended, however, not necessary unless you are eating the leaves (think spinach or lettuce). Nature, in its awesome wisdom, has provided a means of controlling leaf miners; parasitic wasps that preys on this larvae. If you are lucky to have some of these in your garden you may not even have to do anything.
Have you had leaf miners in your garden? If so, let us know what you've used to control them.
Monday, September 5, 2011
If it smells like oregano and tastes like oregano...
 |
| Oregano Brujo |
Oregano brujo is widely available in Puerto Rico and is ideal for growing in containers. Why? It grows fast, needs little water, loves heat, and can be grown in the shade. Oregano brujo can be planted in poor soil but it grows best on a good quality potting mix. It is able to tolerate periods of drought or stagnant water but we recommend that you maintain a constant moisture level. Supplement once a month (or more frequently if you are continuously harvesting) with a high nitrogen or balanced fertilizer (20/20/20 is the most common in PR). If you are feeding it (and harvesting) constantly we recommend to give the plant more than 6 hours of direct sunlight. However, you can also grow it in the shade with just 2-3 hours of direct sunlight. Just remember that your plant's growth rate will be proportional to the amount of sunlight it receives and the nutrient levels of the soil.
As you can see oregano brujo really is the easiest plant to grow and it gets even better. To top it off oregano brujo can be propagated by a technique called cutting. Just cut 4-6 inches of the top of the main stem and plant in a moist medium (potting soil would do). In a few days roots will start to grow and you will have a brand new plant! This new plant makes an excellent and original gift for a friend or neighbor. Don't worry about the original plant; it will regrow quickly.
Oregano brujo is a versatile plant with many uses. Nowadays the leafs are primarily used to season meat but traditionally they've been used to treat illnesses such as coughs, sore throats, indigestion and even infections. Because of its strong smell, the plant can also be used as an insect and pest repellant in your garden. In Indonesia it's used in a soup to promote lactation. With so many uses and the relative ease of growing it Oregano brujo should be on every container garden in Puerto Rico. Do you have some Oregano brujo in your garden? What are you waiting for?
Update (3/13/12): Decided to update this post with more information since a lot of people are being directed to this page through search engines. ~Joel
Wednesday, August 31, 2011
What's mine is not mine...it's the birds'
 |
| Ripening tomatoes - Left is yours, right is mine |
But here we were with a healthy looking plant that still had green tomatoes. So we waited and waited and just when I had given up hope that they would ever ripen I saw a hint of red at the bottom of two tomatoes. Success! We would finally be able to eat our first tomatoes. Or so we thought.
Today I woke up and did my usual routine of checking and watering the plants. Everything looked good. There was one tomato fully ripened so I made a mental note to pick it in the afternoon. Mistake. I came home at noon and the tomato was missing. WTF! No one had picked it, it had not fallen...something must have taken it. That's when I realized that what's mine is not mine, it belongs to the birds. Sneaky little bird came and took our tomato. Lesson learned. We picked the other ripe tomato and ate it right there and then. It tasted great. Go eat someone else's tomato, crazy bird.
Sunday, August 28, 2011
Tricks and Treats: Mint Yourself
 |
| Mint or Mentha |
Tricks
Mint are mostly short-lived perennials that spread by underground stems. If you are looking for a particular species, start with small plants because with so many available varieties you might end up with the wrong one. Also sometimes seeds are slow, although this was not our case. Ours sprouted in a couple of days and grew savagely.
Mint is fairly easy to grow, it is said you can "plant and step back". It's best not to mix mint in a container with other plants as the roots tend to take over and can crowd neighbor plants. Actually our mint grew so much that it strangled itself. If this is your case, just prune back heavily and it will sprout again.
Treats
We tend to think of mint in terms of beverages but it actually has many culinary uses. Mint leaves are used in teas, beverages, jellies, syrups, candies, and ice creams. Numerous ethnic dishes are seasoned with mints of different kinds.
Besides its flavor, mint is highly regarded for its smell. Position your mint container where you can brush against it as you walk by or near your favorite seating spot and brush against your face after a busy day to calm your nerves. Mint is employed for medicinal use. Rub on itchy skin or on you gums to alleviate toothache. Mint also aids digestion; traditional after-dinner mints grows from this! Peppermint is a good antispasmodic, so you can use it on tea for menstrual cramps, diarrhea and tummy-ache.
Mint is almost instantly related to mojito! But to give it nice twist I want to share an original recipe: Raspberry Mojito. Super easy to do and delicious.
Raspberry Mojito
Ingredients:
- Raspberry Rum
- Club Soda
- Sugar
- Water
- Raspberries
- Mint!
Add water to sugar little by little until you create a syrup. Mix Raspberry Rum, Club Soda and sugar syrup in equal quantities. Gently mash mint leaves with a muddler. The mint leaves should only be bruised to release the essential oils and should not be shredded. Add some raspberries to the mix and leave the others to use as garnish along with some mint leaves. Cheers!
Thursday, August 25, 2011
The F Word
I know, I know. Today's title is a poor attempt to grab your attention...but if you're reading this it worked. I've promised to write about today's topic for quite a while now. No, not the pesto night. That one's coming soon, I promise. Today's topic is the F word....Fertilizing. Plants need three main elements to grow: nitrogen (N), phosphorus (P), and potassium (K). Nitrogen stimulates healthy foliage, phosphorus is for flowers, and potassium promotes strong roots. Plants also need other minerals in smaller concentration for optimum growth. These include chlorine, copper, iron, manganese, molybdenum, and zinc.
The three numbers prominently featured in fertilizer packages represent the N-P-K percentage of the fertilizer (example, 5-10-5). If you're growing plants for their leafs (think lettuce) then you want a fertilizer with a high nitrogen ratio. If you're growing plants that flower (think tomatoes) you want a higher potassium concentration.
Fertilizers can be classified into two categories: liquid/powder fertilizers and slow-release fertilizers. Liquid or powder fertilizers are meant to be dissolved into water. You apply them when watering your plants. Slow-release fertilizers are applied directly to the soil. They come in time-release shells which dissolve over time releasing nutrients into the soil. They can last from 4-8 months, however, in containers, because of the frequent watering needed, slow-release fertilizers last only between 2-4 months. We recommend mixing slow-release fertilizer into your potting soil before planting and then supplementing with a liquid/powder fertilizer when necessary.
If you've been reading our blog you may have noticed that we've talked about "balanced fertilizers". A balanced fertilizer is simply one with a 1-1-1 ratio of N-P-K (example, 5-5-5). To keep it simple you can use a balanced fertilizer for everything and supplement other elements when needed (for example, phosphorus booster for roses or tomatoes).
So now that you've learned your basics about the F word go and F something.
Tuesday, August 23, 2011
After the storm
So it seems I jinxed myself. Two days ago I posted that Irene wouldn't stop us unless the internet went out. Guess what. The internet went out... for two days. Lesson learned: Choose your words carefully.
Speed round today
Speed round today
- Our plants are ok. We moved them outside today and they seem happy.
- We're keeping inside the tomato that was broken to speed up its recovery. So far it's looking like it will recover.
- On Saturday we picked our first cucumbers. They measured approximately 6 inches. They were delicious.
- Peppers continue growing. We have three growing right now with a bunch of flowers on each plant.
- Tomatoes keep growing too. Hopefully we will be able to harvest them in a few weeks.
- We have a new addition to the garden: Lupin (aka Lupine). Lupin is a tall flowering plant that comes in many colors.
Sunday, August 21, 2011
Tropical systems and your garden
 |
| Tropical Storm Irene |
When planning your garden make sure you are able to move all of your plants. Place large, heavy containers on top of a dolly or other wheeled object. Make sure your trellises and other supporting structures are easily removable. Water shouldn't be a problem since it will be plentiful outside but having 2-3 days worth of water for your plants wouldn't hurt. Plants will require less water than usual since they won't be exposed to wind and sun. Do not worry about your plants not receiving enough sunlight for a few days. Your plants will survive.
That's all we have for today. Follow these simple guidelines and your plants will be safe. If you are in Puerto Rico and growing a container garden get your plants inside. It's better to be safe than sorry.
Thursday, August 18, 2011
Pickling your interest - Part 2
 |
| Yes it's big. |
Once the crazy growth starts you will see a few males flowers blossom. A few days afterwards you will start seeing female flowers (the ones with a little cucumber behind them). At this point you can follow our advice for pollinating if there are no bees in your area. Once the cucumbers start growing you need to keep an eye on them. Never let a cucumber mature in the vine. If the skin turns yellow your cucumber has matured and the plant will stop producing cukes. Picking the cukes early and often will encourage the plant to produce more.
We still haven't picked any cukes yet but they are only a few days from being ripe. Once we pick the first we'll let you know how they taste. If you follow our advice you will be getting cukes yourself in no time. If you do let us know how they taste. Until next time!
Tuesday, August 16, 2011
Man Down! - When Disaster Strikes
 |
| :-( |
 |
| The plant broke at the stake height |
A slightly broken tomato trunk can be saved by splintering it; much like you would do with a bruised finger. This one, though, is damaged past the point of splintering. One error we commited when planting this tomato was that we did not provide a supporting structure or large stake to tie down the plant. Tomatoes can get very tall and top heavy so providing some support is recommended. We had a small 1 foot stake which actually contributed to the problem (see picture). Lesson learned!
 |
| Will it survive? |
I hope you all learned from our mistakes and take our advice on how to plan for growing tomatoes. Join us next time for more on cucumbers. I hope.
Monday, August 15, 2011
Pickling your interest
 |
| Our cucumber container |
Cucumbers are usually categorized into pickling and slicing varieties. Slicing varieties are ideal for eating raw while pickling are better for making...pickles. In nature they grow in vines but plant breeders have come up with some variations that grow like a bush. Our cukes are the vine type. Vines can grow up to 6 feet long so take that into consideration when planting cucumbers.
 |
| Small strings attaching to the net |
 | ||||||||
| Pollinating a female flower |
Well that's all we have for today. If we pickled your interest join us tomorrow for more cucumber action. Who knows we may even show you our cukes!
Sunday, August 14, 2011
The more the merrier - Arugula!
 |
| Our Arugula seedling |
Arugula, also known as rocket or roquette, is a garden salad commonly used in Italian cuisine. Although not as common in Puerto Rico as lettuce or spinach it is beginning to show up with more frequency in fine dining restaurants. It has a sharp, peppery flavor which differs dramatically from other salad greens. I would recommend planting Arugula in fall, winter, or early spring as it has a tendency to bolt (produce seeds) quickly in summer. If you want to grow it in summer find a shaded area under a large plant such as a tomato. To harvest just cut a few leaves and the plant will grow some more.
Keep tuned to follow the progress of this tiny Arugula and for more info on growing container gardens in Puerto Rico.
Saturday, August 13, 2011
Tricks and Treats: Basil - Yucky, Yummy Edition
Hi again, good to have you back! Today we have another edition of Tricks and Treats© for basil: Yucky, Yummy Edition! Specifically, we’ll talk about basil common diseases and some ideas on how to use basil.
Tricks for the Yucky!
Always starting at the root… root rot is fairly common with basil. As the fungi needs moist cool soil to grow in, root rot might present by over-watering the plant. As a first sign, be alert for lower foliage that turns yellow or drops off the plant. The roots of the plant will appear brown and mushy, unlike healthy roots that appear firm and tan in color. To get rid of it, change the soil of the plant and decontaminate the container with a mix of 9 parts water, 1 part bleach.
Basil can suffer from several foliar diseases that can ruin the crop and reduce yield.
A common disease of basil is gray mold; it looks exactly as it sounds. It can also cause infections post-harvest and is capable of killing the entire plant. Black spots can also be seen on basil foliage. Both can be controlled by spraying the leaves with a mix of half a gallon of water and one teaspoon of baking soda (not powder!).
 |
| Gray Mold on our culantro leaves |
Treats are the Yummy!
Basil Vinegar
Take all your excess basil snippings (which you’ll have lots when the plant starts flowering), stuff them loosely into a glass jar with a fitting lid, and pour enough vinegar to cover all foliage. Red wine vinegar is a great complement for basil. Wait about a week, during which time the vinegar will extract the flavor, aroma and color from the basil. Strain off, discard the snippings and voilà you have made basil vinegar!
When using basil vinegar for cooking, use your imagination. It sure can make a delicious salad dressing but you could also add it to pot roasts, stews, sauces or even over steamed vegetables. If you enjoy basil fragrance so much, another delightful use for basil vinegar is in the bath. Oh yes, soak yourself in aromatic hot water heaven. Add about a cup of basil vinegar to the bathwater, slip in and enjoy. Basil stimulates blood circulation so it is both invigorating and relaxing. Don’t be afraid to sink in and start making bubbles, basil vinegar can also be used as hair rinse. The vinegary smell dissipates quickly and you’re left a gentle herbal fragrance on your hair.
Pesto
Nope. The Pesto Night Story is not today. Pesto is traditionally made with pine nuts, garlic, olive oil, basil, and Parmesan cheese. It's most popular use is tossed with pasta.
Ingredients:
- 4 cups basil leaves
- 1/2 cup grated fresh Parmesan cheese
- 2 tablespoons coarse-chopped pine nuts
- 2 garlic cloves, peeled
- 3 tablespoons extra-virgin olive oil
- 1/4 teaspoon salt
Preparation:
In a food processor or strong blender, with the motor running, drop the pine nuts and garlic through the feed chute. Process until finely minced. Add the olive oil and pulse three times. Add basil, Parmesan cheese, and salt to the processor bowl. Process until finely minced. Refrigerate leftovers and use within 1 week.
Have you bought your basil seeds? What are you waiting for!
Subscribe to:
Posts (Atom)