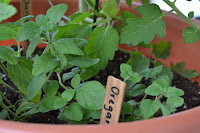
Showing posts with label Basil. Show all posts

Wednesday, June 13, 2012

Grow and Bake: Herb Bread

Ready-to-eat soft herb rolls.
A great way to make use of your edible garden plants is to improvise in the kitchen once in a while. I love the kitchen and I've made quite a few recipes with our garden fruits (and veggies), some of which I've shared with you such as a basil pesto, and arugula pesto recipe. Today I want to tell you about a bread recipe we tried. A dear friend (you know who you are and we hope you are reading this) came to visit us and he taught us how to do several kinds of bread. Of course, we wanted to use our garden herbs to make them more tasty. We initially used thyme but we have repeated the recipe several times using basil and rosemary. These three herbs are among the Top 8 Herbs to Grow for Bread Baking.

Making bread is tricky. It's not just about following a recipe. You need to familiarize yourself with certain basic concepts and have some specialized equipment at hand. Let's go over them.

Before you even start looking at the ingredients you will need the following equipment: a measuring scale, a mixer, and a baking thermometer. You will need a scale to measure ingredients because their weight is affected by humidity and elevation. The mixer is optional but preferable as it takes a lot longer to knead by hand. The thermometer needs to be able to measure up to 400ºF (200ºC). Beware that most meat thermometers do not reach these temperatures.

The bread recipe we use includes ingredients you are likely not to have at home, so make sure you have all the ingredients before starting anything.

Ingredients:
  • 12.5oz (375g) water
  • 0.75oz (22g) yeast, fresh
  • 1lb 5oz (625g) bread flour
  • 0.4oz (12g) salt
  • 2oz (60g) sugar
  • 1oz (30g) nonfat milk solids
  • 1oz (30g) shortening
  • 1oz (30g) butter
Mise en place
Perform your mise en place (Editor's note: yes, Jessica also likes the fancy words) by placing each weighted ingredient separately in small bowls. Either by hand or in the mixer start by mixing fatty ingredients such as shortening and butter. This will start breaking the fats which makes everything mix better. Add the salt, milk solids, water, and sugar and start adding little by little some of the flour. After mixing for a minute or two, stop the mixer.

Lay a bed of flour on the top of the mixture and on top of that add the yeast. Note that the recipe calls for fresh yeast but we used instant yeast with no observable differences. You can substitute for active yeast but this is not recommended as the dough will not rise much and the bread will be dense and hard (believe us, we know by experience). You want bread to be soft and fluffy. Top the yeast with more flour and start mixer again. The reason to place the yeast in between layers of flour is because the milk and salt kill the yeast. Add 1/4 of the remaining flour and then gradually keep adding flour. It is possible (although unlikely given Puerto Rico's humidity) that you won't need all your measured flour.

Pay close attention to the dough, it will start to separate from the mixer bowl walls becoming a ball around the mixer attachment. When the dough has detached completely, including from the bottom of the mixer bowl, stop the mixer and do the dough windowpane test. The dough windowpane can be verified by taking a tiny portion of the dough and stretching it between your fingers. You should be able to see the dough stretch about an inch without breaking. If the window breaks it is not ready. Keep adding flour until the mixture detaches from the bottom and the appropriate dough windowpane is observed.

When the dough is ready it is time to add your herbs. About 0.18oz to 0.28oz (5g to 8g) of your favorite herb is enough. Decide based on how strong the flavor of the herb is and the intensity you want on the bread. We used 5g of thyme, about 5g of rosemary and 8g of basil for ours.

Pinch dough while rolling
Fermentation is an important part of the process. Create a ball with the dough, folding the sides over the center towards the bottom part of the dough until you create a seam-free ball. Roll the dough in a tight circle on a flat surface such as the kitchen counter to make the surface as smooth as possible. Don't use too much flour to dust the surface, the dough must stick a little to the counter for the technique to work. Pinch the dough against a flat surface (read: kitchen counter) for better results.

Place the dough on a deep bowl and cover with plastic wrap. Let it ferment for 1 to 1-1/4 hours at room temperature. If you used fresh instant yeast, the dough should double in size. Remember that with active yeast, the dough won't grow too much (yes, active sucks). When fermentation time has elapsed, punch down the dough allowing air to escape. The punch relieves stress on gluten, squeezes out excess carbon dioxide, and divides air pockets evenly which makes it easier to shape the dough resulting in softer bread.
First fermentation: 1 to 1-1/4 hour

This dough can be used to make loafs, soft rolls and even cinnamon bread. We decided to do soft rolls. Divide the dough into 2oz pieces, it will yield about 20 bread rolls. Roll each piece into seam-free balls as before.

Now we need to perform a second fermentation, better known as proofing, for 15 to 30 minutes in a high temperature, high humidity environment. Tip: You can use your microwave. Bring water to a boil in a small bowl and place your rolls inside. The steam will create enough heat and humidity for this second fermentation.

If you want your rolls to be nice and golden you can brush eggs whites or butter on top of the rolls. Bake at 400ºF (200ºC) until rolls have reached the same internal temperature. To check the temperature place thermometer (finally we get to use the thermometer!) from the side so as not to disrupt the aesthetic of the rolls. The rolls should reach the appropriate temperature in about 15 to 20 minutes.

Let them cool down a little before eating, chemical processes are still happening for several minutes after your remove them from the oven and the flavor would be different. Spread some butter or cream cheese and enjoy!

Update: Our "dear friend" came over to our house and notified us of some errors in this post. So we've made some slight corrections. We apologize for this inconvenience and thank you for choosing container gardening in Puerto Rico.

Monday, December 19, 2011

It's the Season... for Herbal Vinegars

The Holidays are here and we already feel the spirit. We just want to party, have some days off, eat the season's treats... but we also want to share with family and friends and give away nice reminders of love and care. (Editor's note: #spreadthelove) As a gardener you have lots to share. Today we'll talk about one of the many great gift ideas for the season: herbal vinegars. 


We previously talked about basil vinegar in our Yucky-Yummy post. The process to prepare any herbal vinegar is basically the same. Take snippings or leaves of your favorite herb, stuff them loosely into a glass jar with a fitting lid, and pour enough vinegar to cover all foliage. White wine and red wine vinegar are the best kind to combined with herbs. Wait about a week, strain off and discard the leaves (This is an important part since the leaves will rot in your vinegar. Yuck). There are numerous recipes that use herbal vinegar. Remember they make excellent salad dressings but can also be added to pot roasts, stews, sauces for chicken and fish or steamed vegetables. 

If you enjoy herbal fragrances, another delightful use for these vinegars is hydrotherapy. The process is simple: add about a cup of herbal vinegar to the bathwater, slip in and enjoy. Alternatively you can just add half a cup to use it as a hair rinse. Don't worry, the vinegary smell dissipates quickly and you’re left with a gentle herbal fragrance on your hair. Many herbs are good for your skin and so is the vinegar itself. Vinegar cleanses the pore, restores skin and hair pH to the proper level, it's also good for your scalp, and helps reduce dandruff.

Each herb provides different benefits to your body or hair: 
  • Chamomile is considered soothing and relaxing and it is excellent for dry skin. 
  • Bay, oregano and sage are good for sore muscles. 
  • Basil, bay, fennel, lavender, mint, rosemary, sage and thyme stimulate blood circulation, so they are both invigorating and relaxing. 
  • Calendula and spearmint are also soothing to tough or damaged skin. 
  • The foliage and flowers of bay, nasturtiums, rosemary, and sage have astringent properties which will tighten the pores of the skin. 
  • Calendula and chamomile lighten hair color, blonds get blonder and auburn and redheads get brighter.
  • Sage darkens hair color.
  • Calendula, parsley, rosemary and sage add shine and body to the hair, and help control dandruff.
  • Chamomile makes hair softer.
  • Calendula, lavender, mint and rosemary are good conditioners for oily hair.
  • Parsley and sage are good for dry hair.

Safety precautions: Not everyone reacts favorably to herbs, beware of allergies. Test vinegars on your skin before using any new herb. Dab some on with a cotton ball and wait and hour or so for any reaction. Discontinue use if redness or itchiness appear.


Nice bottles with a few touches will make your gift extra-special
Once you are familiar with the pleasures and benefits of the different herbal vinegars, you will surely want to share the experience. Bottles of herbal vinegar make very nice gifts. Use the following hints to make them extra-special: 
  • Use pretty bottles, the kind with removable stoppers are the best. 
  • Strain the finished vinegar to remove all particles. Although a spring in the bottle does look nice, the fact is that it degrades too fast, creating unpleasant layers of sludge. If you really want to include a spring or some leaves attach them to the outside of the bottle.
  • Create a gift tag describing ways to use the vinegar, both in cooking and cosmetically or add a recipe card.
  • Add crafts or labels with floral or herbal designs, either to the bottles or the tags.

Send us your comments about your herbal vinegars or other gardening gifts this season. We bet everyone will be delighted. Happy Holidays!

Sunday, September 18, 2011

Does it come in purple?

Purple Ruffles Basil
By now you must have figured out that our favorite plant is basil (evidence:In the beginning there was basil, Tricks and Treats - Basil and Tricks and Treats - Basil Part 2).  Jessica uses basil in everything from meat seasoning to salads. Everyone should have at least one plant in their garden. We have two.

A few days ago we were at Home Depot's when I stumbled upon an odd looking plant that I had never seen before. It was about six inches tall with ruffled purple leaves. Imagine my surprise when I read the tag: "Albahaca Mora" ("Purple Basil"). WTF! Purple Basil! It couldn't be. Its leaves didn't have the shape of basil, it was purple, and it didn't smell quite like basil. So what this plant incorrectly labeled? Was I being duped? I didn't care. I had to buy it. (Editor's note: Impulse buys are not recommended or endorsed by Container Garden PR, Inc or its affiliates. Always research plants before you buy. Now back to our regular programming.)

When we got home I noticed that its leaves weren't solid purple instead it had green edges. Now I was sure I was duped. So we got on the internet to see if purple basil existed. Thankfully it did. What we had bought was a sweet basil variant called "Purple Ruffles". It's commonly used to create purple pesto and basil vinegar (which Jessica plans on doing and documenting). Supposedly it also has a slightly different flavor than common sweet basil. We still haven't tasted it yet so we can't comment on its flavor yet. We also read that the leaves can lose their purple color for various reasons including too much sun or too much humidity so we'll have to experiment with various locations to maintain the striking purple color. Keep tuned for updates on how this purple basil and all our other plants are doing.

Saturday, August 13, 2011

Tricks and Treats: Basil - Yucky, Yummy Edition

Hi again, good to have you back! Today we have another edition of Tricks and Treats© for basil: Yucky, Yummy Edition! Specifically, we’ll talk about basil common diseases and some ideas on how to use basil. 

Tricks for the Yucky!

Always starting at the root… root rot is fairly common with basil. As the fungi needs moist cool soil to grow in, root rot might present by over-watering the plant. As a first sign, be alert for lower foliage that turns yellow or drops off the plant. The roots of the plant will appear brown and mushy, unlike healthy roots that appear firm and tan in color. To get rid of it, change the soil of the plant and decontaminate the container with a mix of 9 parts water, 1 part bleach.

Basil can suffer from several foliar diseases that can ruin the crop and reduce yield.
Gray Mold on our culantro leaves
A common disease of basil is gray mold; it looks exactly as it sounds. It can also cause infections post-harvest and is capable of killing the entire plant. Black spots can also be seen on basil foliage. Both can be controlled by spraying the leaves with a mix of half a gallon of water and one teaspoon of baking soda (not powder!).

Treats are the Yummy!

Basil Vinegar
Take all your excess basil snippings (which you’ll have lots when the plant starts flowering), stuff them loosely into a glass jar with a fitting lid, and pour enough vinegar to cover all foliage. Red wine vinegar is a great complement for basil. Wait about a week, during which time the vinegar will extract the flavor, aroma and color from the basil. Strain off, discard the snippings and voilà you have made basil vinegar!

When using basil vinegar for cooking, use your imagination. It sure can make a delicious salad dressing but you could also add it to pot roasts, stews, sauces or even over steamed vegetables. If you enjoy basil fragrance so much, another delightful use for basil vinegar is in the bath. Oh yes, soak yourself in aromatic hot water heaven. Add about a cup of basil vinegar to the bathwater, slip in and enjoy. Basil stimulates blood circulation so it is both invigorating and relaxing. Don’t be afraid to sink in and start making bubbles, basil vinegar can also be used as hair rinse. The vinegary smell dissipates quickly and you’re left a gentle herbal fragrance on your hair.

Pesto
Nope. The Pesto Night Story is not today. Pesto is traditionally made with pine nuts, garlic, olive oil, basil, and Parmesan cheese. It's most popular use is tossed with pasta.
Ingredients:
  • 4 cups basil leaves
  • 1/2 cup grated fresh Parmesan cheese
  • 2 tablespoons coarse-chopped pine nuts
  • 2 garlic cloves, peeled
  • 3 tablespoons extra-virgin olive oil
  • 1/4 teaspoon salt
Preparation:
In a food processor or strong blender, with the motor running, drop the pine nuts and garlic through the feed chute. Process until finely minced. Add the olive oil and pulse three times. Add basil, Parmesan cheese, and salt to the processor bowl. Process until finely minced. Refrigerate leftovers and use within 1 week. 

Have you bought your basil seeds? What are you waiting for!

Friday, August 12, 2011

Tricks and Treats: Basil Edition


Greetings fellow blogger-enthusiasts, this is my first time with you! As the official photographer, my contribution to this blog will naturally be photos but once in a while I might have a thing or two to say. Today, since Joel started talking about basil, we are going to cover the Tricks and Treats© for basil.

Tricks!

Let’s start with the root. Basil has a very vigorous root system so it needs lots of food (rich soil), lots of water and lots of space for its roots. Fertilize basil cautiously as it can decrease the aroma. Later on we will explain fertilizers in detail but for now be content with knowing that you can use a balanced fertilizer or one high on Nitrogen which will encourage foliage growth.

To encourage a bushy, healthy plant and to maximize production, don't be afraid to prune basil. Yes Joel, pruning! This is a sensitive topic and will be covered in our Pesto Night story (coming soon, promise). Basil will usually have to be pruned every 2 to 3 weeks. Once the plant is allowed to flower, it may produce seed pods containing small black seeds, which can be saved. Once you have the desired seeds, pinch off the flower buds as soon as they begin to emerge. Cut them at the point where just four leaves are left if what you want is maximum leave production.

Treats!

Ok, now let’s use it! Basil can be dried, frozen or used fresh. Dry basil in small bunches by hanging them upside down in a dark, dry, warm, well ventilated room or on screens placed outside in the shade. Another method of drying is on a low setting in the microwave. Prepare the basil by sandwiching it between two paper towels. It could take up to 3 minutes to dry basil in the microwave. Stop periodically throughout the drying process to turn the basil to help promote quicker drying and to avoid burning. You can also preserve basil by freezing it in ice cubes (nearest to fresh taste when added to cooked foods), putting fresh leaves in vinegar or oil (most useful in salad dressing), and to make pesto.

Frozen and dried leaves are worth the effort but the best flavor is found in fresh leaves. The leaves can be used cooked or raw. In general, if cooked, it is added at the last moment, as cooking can quickly destroy the flavor. Crush, chip or mince the leaves and add to recipes, or add whole leaves to salads. Sprigs of basil make a wonderfully aromatic garnish. The flowers are also edible!

Tune in tomorrow for more Tricks and Treats©.

Thursday, August 11, 2011

In the beginning there was basil

So I've been pondering about which topic to write and a revelation dawned on me. Start at the beginning! In the beginning there was basil. Jessica wanted to have some basil for cooking (and some mint for mojitos) so she bought some seeds at Walmart and planted them in a little pot. The idea was for the pot to sit by the kitchen window. But then we bought some additional seeds and since we live in an apartment we had no choice but to move everything to the balcony.

Below is how the basil plant looked as a seedling and how it looked at the height of its growth (before the sad pesto night [we'll talk about that in a future post]).
Basil seedling (left), mint (right)
Full grown basil (center)


Basil is one of the easiests plants to grow in the tropics. They love heat. There are many varieties of basil: sweet basil, greek basil, cinnamon basil, clove basil, etc. Ours is the most common variety: Sweet Basil. You can grow basil from seeds or cuttings. I recommend seeds. Usually books will list basil as a full sun (6 hours of direct daylight) plant. However, here in the tropics it can grow vigorously with only 4 hours of sun although 6+ is better. Most books will list basil as an annual but in the tropics it can be grown as a perennial.  A full size basil plant needs 6-8 inches of soil depth to develop its root. As a rule of thumb the bigger and deeper the container the better. As far as soil for containers always use potting soil; garden soil and top soil are inadequate for containers. Soil must be fast draining but it needs to be able to hold moisture. Any quality garden soil is adequate for growing basil.

If you've only tried dried basil you will be amazed by the difference in taste of fresh basil. So get growing! In a future post we'll discuss tricks and treats (© Jessica) for growing and using basil.


Wednesday, August 10, 2011

Roll Call

Time for a little roll call. Below are the plants we currently have in our garden. Photos taken by of our official photographer, my lovely girlfriend Jessica.
Verbena (right)
Culantro
Chives

Tomatoes

Pepper and parsley (at left)

Parsley

Mint
Cucumber
Chamomille
Lettuce
Romero
Miniature Rose
Oregano
Payasito
Basil (center)

Unknown flowering plant